Date: October 2006
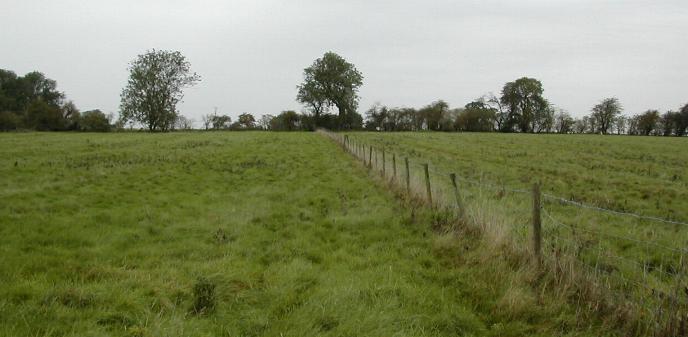
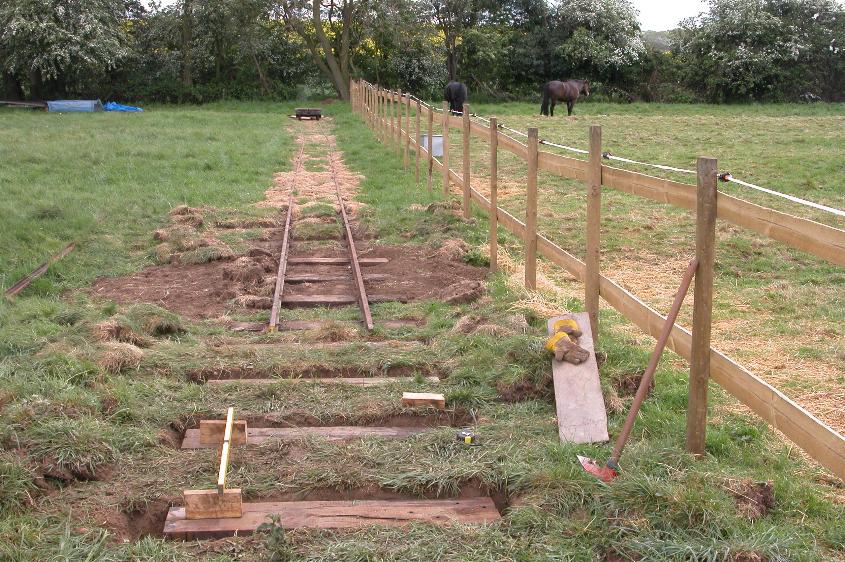
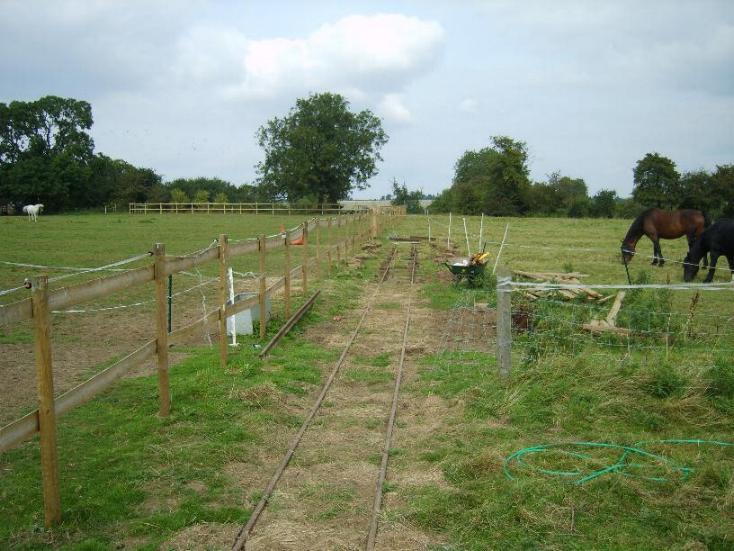
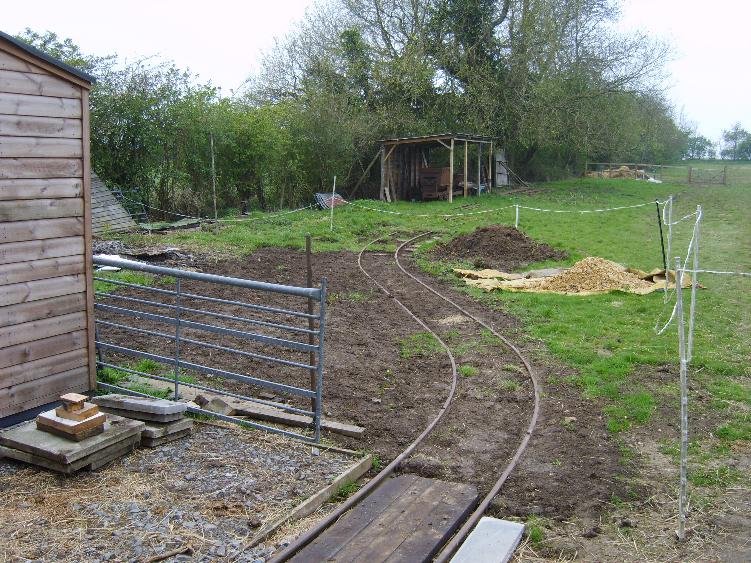
A glimpse of part of the fields prior to railway construction and separation into paddocks.
| Introduction | Construction | Operation | Locos | Updates | Contact |
| Return to the main INGR site |
|
|
|
|
|
Date: October 2006 |
|
A glimpse of part of the fields prior to railway construction and separation into paddocks. |
For anyone who has thought of building their own narrow gauge railway, big or small, it can be done, and can be done with the minimum of tools and resource and mechanical aids. Everyone has to start somewhere, and the purchase of the tools, the materials, rolling stock, etc, in this case all proceeded at a gradual pace when available, or when the need arose.
Sleepers were typically purchased in small batches of 10-20 standard gauge sleepers, and then sawn in half using a chainsaw. Latterly, batches of used narrow gauge softwood sleepers were purchased from Alan Keef. Rail was another item difficult to obtain secondhand and at a reasonable price. Regular contact with the firms of Alan Keef, HoldTrade, and Tunnel Steel has always proved useful. They were always able to supply fishplates, fishbolts, and rail spikes. These were also purchased in small qualities as construction proceeded throughout the year.
Ballast was not used except for a couple of places. The line was always to be a practical railway to assist with the management of the paddocks and horses, and so bringing the rails down to ground level allowed them to be put across the fields without restricting movement of the horses, or tractors when necessary.
The Springfield Agricultural Railway was conceived in December 2006, when a move led to the opportunity and requirement to manage transport across a couple of fields that needed dividing up into paddocks and then managing the disposal of horse manure to keep it away from the house and other nearby properties. In winter the fields can get waterlogged in places, and regularly driving a tractor in these conditions would churn up the ground. There was also a need to deliver water to water troughs which were too far to be easily served by garden hose.
I wanted to see if it was possible for one person basically working by themselves to construct a railway. I had been round narrow gauge railways for many years, visiting and filming mainly industrial, and occasionally preserved systems. However, I had little or no practical experience of laying trackwork, building rolling stock, and maintaining locomotives.
I had purchased a couple of Hudson flat wagons in 2006, and they had been sitting in the garage for nearly a year until a move to the right place fulfilled all the requirements. At the start of 2007, the timber fencing for the paddocks was started, and it was clear after this where the track for the line was also going to run across the fields. In March 2007 the digging started with the first meagre stocks I had assembled to from a number of sources. Just 4-6 lengths of rather battered 20lb rail and a handful of ex-BR sleepers sawn in half by hand! I quickly found out how little there was actually documented in english language books on building a 'feldbahn' type railway. You can count on the fingers of one hand the articles there have been in periodicals and books over the past 10 years or more which describe in practical detail how to calculate the weight of track required to bear the necessary axle loading, the distance that sleepers needed to be set at, the minimum radius for a 4wheel loco depandant on the distance between the wheels centres, how to open up the gauge when laying curves, and a raft of other questions.
A number of people were regularly squeezed for information, and I'm very grateful for all their help and guidance. For although I was never setting out to construct a railway of a standard for passenger or commercial operation, I still needed to understand the basics, so I had confidence in what I was doing. Prior to starting the railway a small Moës 4wDM loco was purchased. It had been imported from Belgium with a number of other similar locos, where it had been used to transport clay at a brickworks. It had not worked for many years and a risk was taken that after a suitable overhaul all would burst back into life. A minor (or not so minor) concern was that the railway was being built including sections which were to have significantly sharp radius curves (without check rails), and also relatively steep gradients. I was not 100% sure that the loco was going to be able to manage these obstacles.
It was realised at the outset that secondhand pressed metal sleepers could not be had for love nor money, and that full sized timber sleepers were rising significantly in price, also that standard 20lb rail was not rolled in this country any more. Secondhand rail of 20lb or 25lb was also hard to come by. So for a railway that was to use mostly secondhand materials, to be built as cost effectively as possible, the lack of availability of suitable materials was regularly an issue.
Please click on the thumbnails to open up a larger picture in the same frame.
|
|

|
|
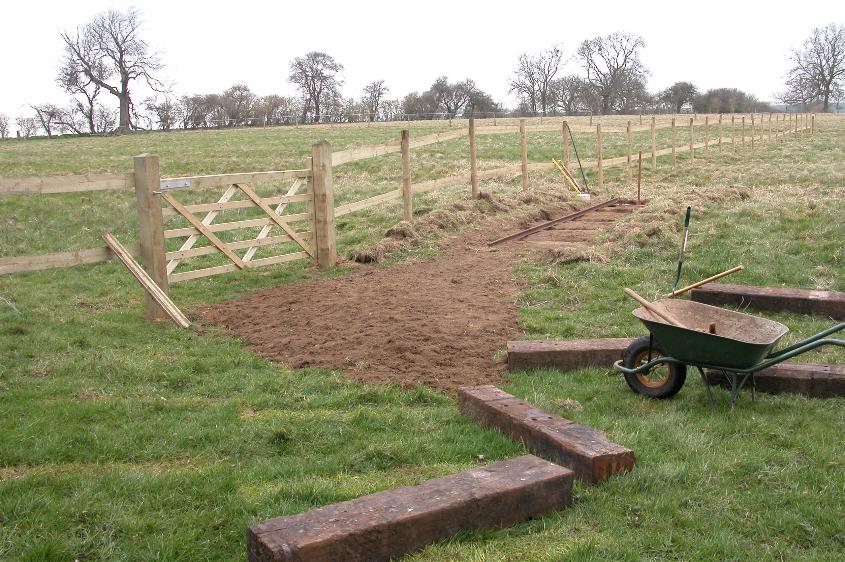
Date: March 2007 |
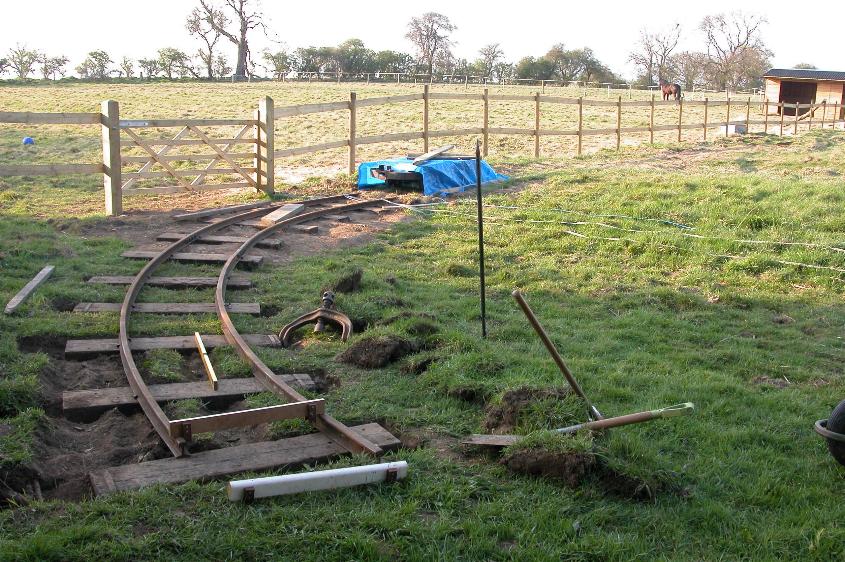
Date: April 2007 |
Date: April 2007 |
|
You have to start somewhere and this was it! |
The Jimcrow was needed right from the start, but using light weight rails enabled the tight curves to be put in without too much blood sweat and tears. |
Again looking in the same direction a few weeks later, another several lengths of rail had been put in. |
Because the tracks were potentially being laid where horses may be loose and there would also be a requirement to occasionally top the fields with the assistance of a nearby friendly farmer, the track was bedded down at grass level, and covered back over once laid. This required a hole dug out to take each sleeper laid to bring the overal height of the track down to ground level. This gave the line a 'lived in' look at an early stage. It would also help to keep everything firm and in place. The drawback with this type of track laying without ballast was the potential to possibly sink into the gound, and any subsequent maintenance would involve digging out the surrounding soil. However, as operation was only envisaged with a few journeys per week, with locos of less than 3 tonnes, and hauling at the most 2-3 skips, it is hoped that this will allow the rails to remain in place and be maintenance free for a reasonable period while the railway is consolidated.
|
|
|
|
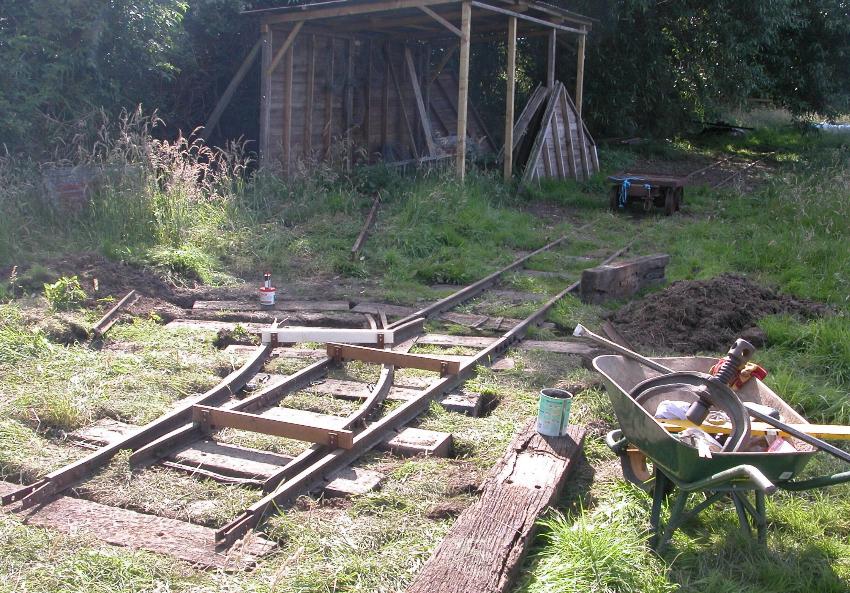
Date: june 2007 |
Date: June 2007 |
Date: July 2007 |
|
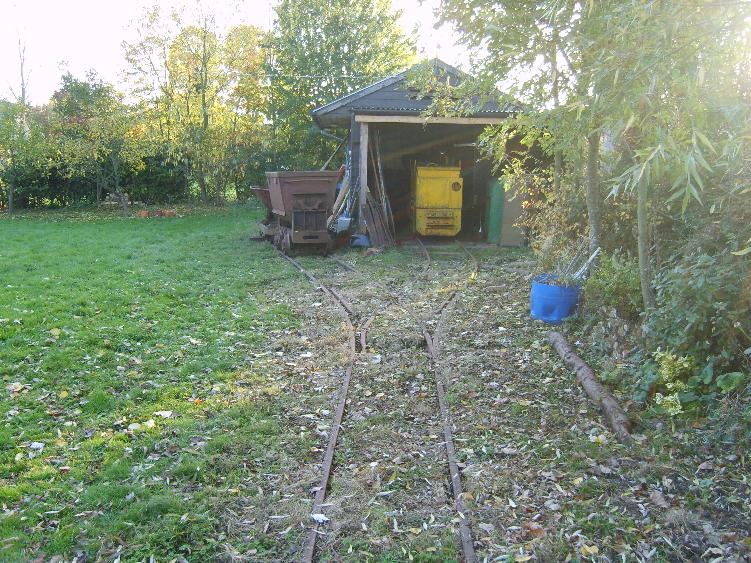
The first point being laid on the line, purchased from the Yaxham Light Railway. This led to a simple lean-to stock shed to keep some of the working wagons under cover. |
At the other end of the lengthening railway it continued along the fenceline towards the far end of the field. |
By the middle of summer 2007 it was well over half way along and nearly at the second field gate. |
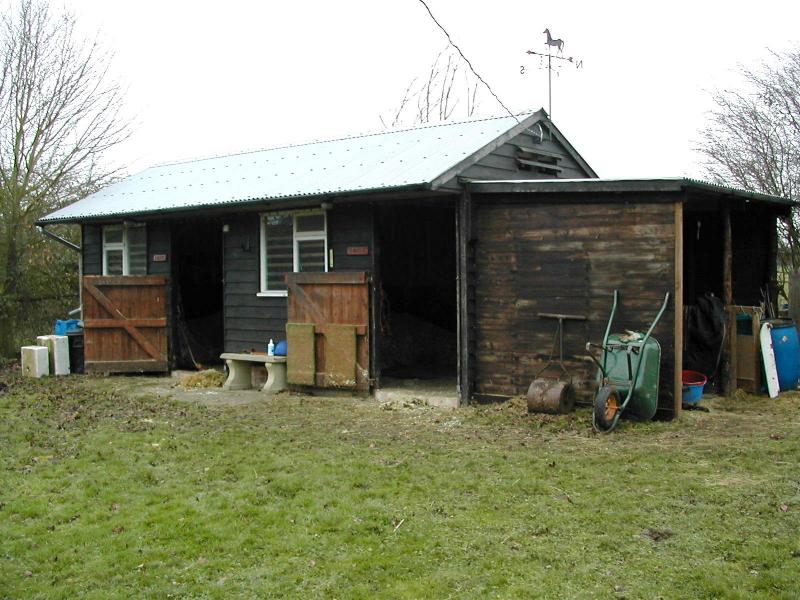
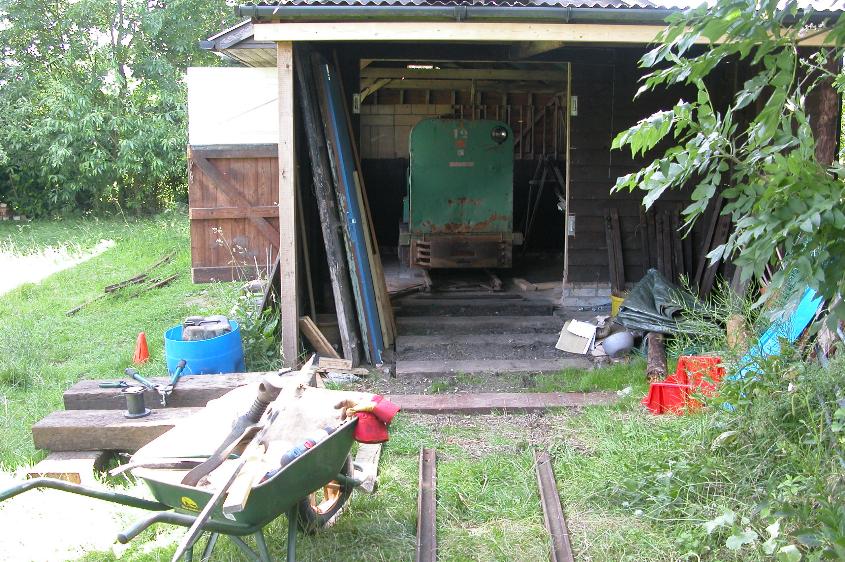
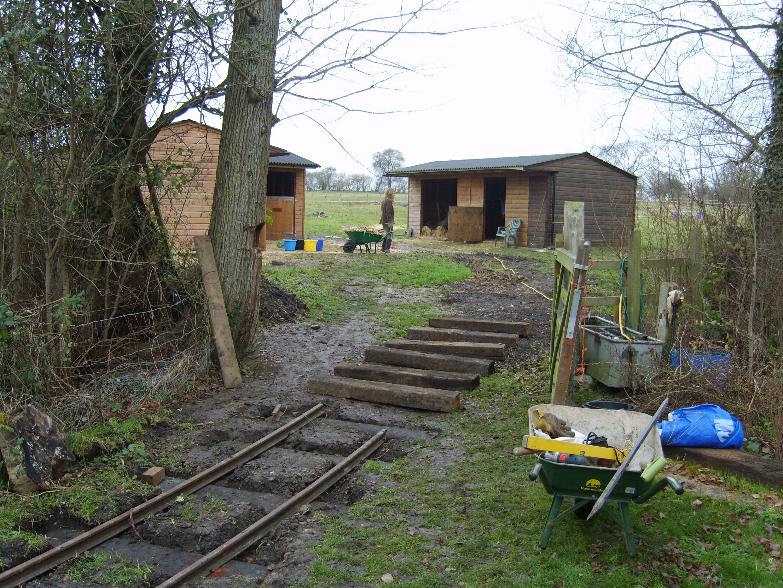
By summertime the stables had been built in one corner of the large field, and field drains and hard standings were built. The old stables 100 metres away had been vacated to allow conversion into a loco shed. Work began to knock a doorway in the end of the building and lay some temporary rails. The lean too at the end of the shed was retained for further undercover facilities, and so at an early stage it was decided that cabless locos would have to be the order of the day because of the restricted headroom.
|
|
|
|
Date: February 2007 |
Date: June 2007 |
Date: June 2007 |
|
The old stable building was still in use for a couple of horses until early summer 2007. |
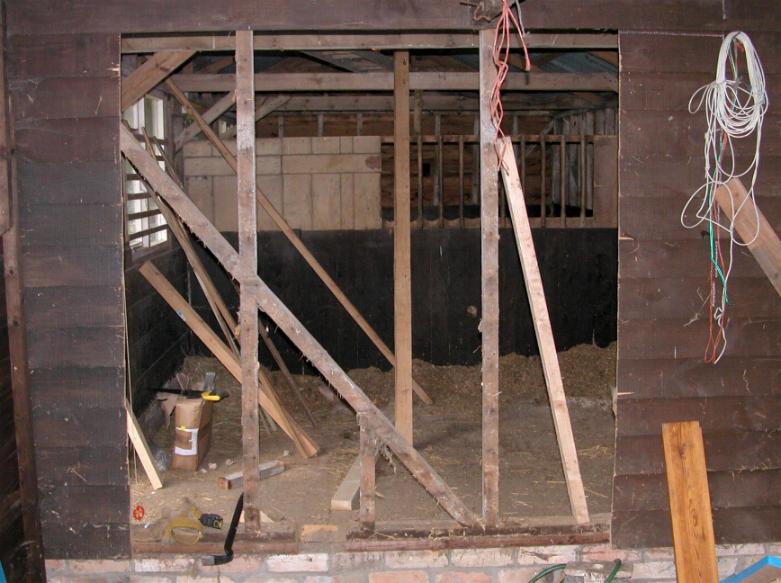
A large hole was cut out at the end of the building, and lower rows of bricks demolished to act as the main doorway for the locos. A new frame was then build round this entrance, to allow doors to be built and hung. |
Once a temporary track had been laid one of the Moës locos was crowbared over temporary tracks across the lawn into the shed so the tarpaulins finally came off, and it was under cover for the first time. |
Once the building was vaguely useable and sleepers and rail bedded down leading into it, a 30lb 'Y' point was purchased to provide access into the shed. From delivery off the lorry, it had to be rolled over the lawn on a series of round posts to move it roughly into position in front of the shed.
|
|

|
|
Date: October 2007 |
Date: October 2007 |
Date: October 2007 |
|
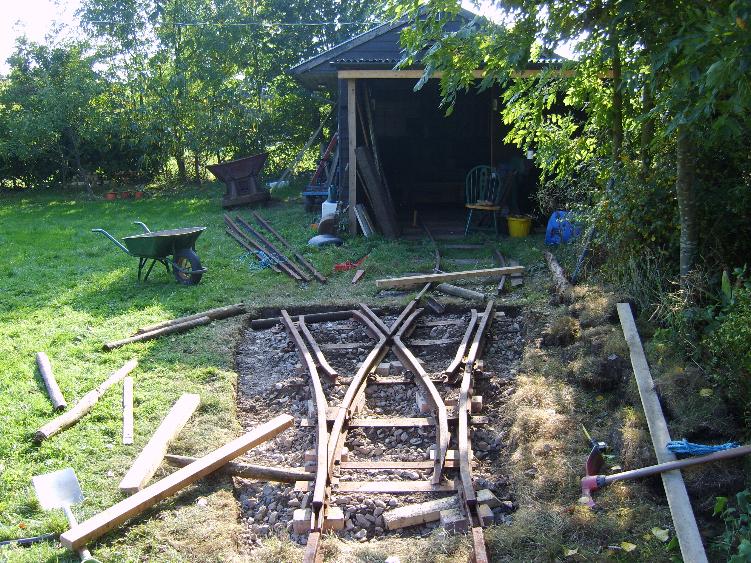
Once the point had been rolled in front of the shed, the exact position was marked out. Then it was rolled out of the way again. |
the area of the point was cut out of the grass, and dug out to a depth to allow a layer of limestone to be tipped in. |
The point was then rolled back into position once the layer of limestone had been built up to the correct height. |
|
|
|
|
Date: October 2007 |
Date: October 2007 |
Date: November 2007 |
|
The next process was to align it accurately vertically and horizontally to the rails into the shed and also where the other rails would be laid. |
This required the point to be temporarily supported in the right position while more limestone was then packed round it. |
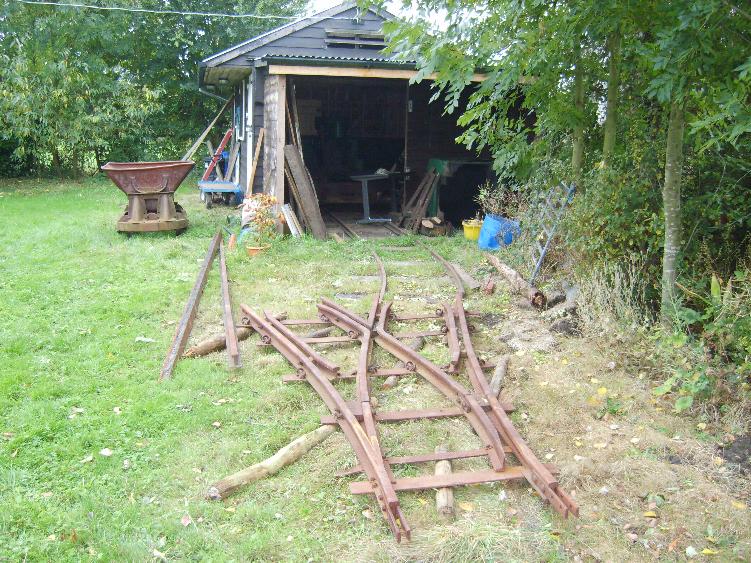
By November the point had been covered over, the additional siding rails laid in place alongside the shed, and one length of rail laid in front of the shed. As yet these did not go anywhere. |
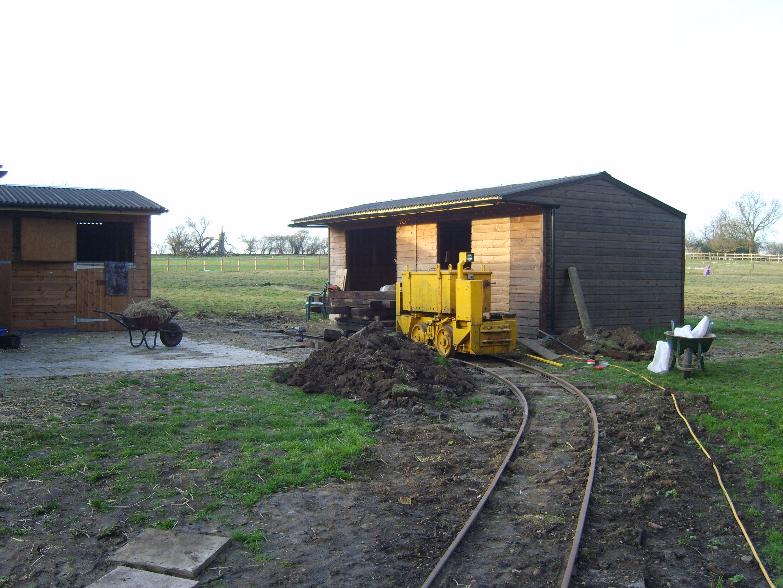
During this period delivery was taken of a Wingrove and Rogers battery loco which unlike the regauged Moës loco was advised to be in full working order. Fortunately because of the basic tracks now recently laid around the shed it allowed for an easy offload directly onto the tracks.
As the tracks previously laid in the field were still not connected up at either end, the next stage was to lay the tracks away from the loco shed, out of the garden, and into the field towards the new stables and eventual connection with the main railway.
The problems of joining up rails of different weights frequently occurred. Having purchased several tonnes of used rail of 20lb and 25lb in weight from Alan Keef, the combination of mismatched fishplates and fishbolt holes frequently needed resolving. Therefore when matching up the different heights and thicknesses of rail steel shims were placed inbetween the fishplates and the rail to line up the running surfaces of the rails.
The next photos show the track laying from the shed towards the new stables.
|
|
|
|
Date: November 2007 |
Date: November 2007 |
Date: November 2007 |
|
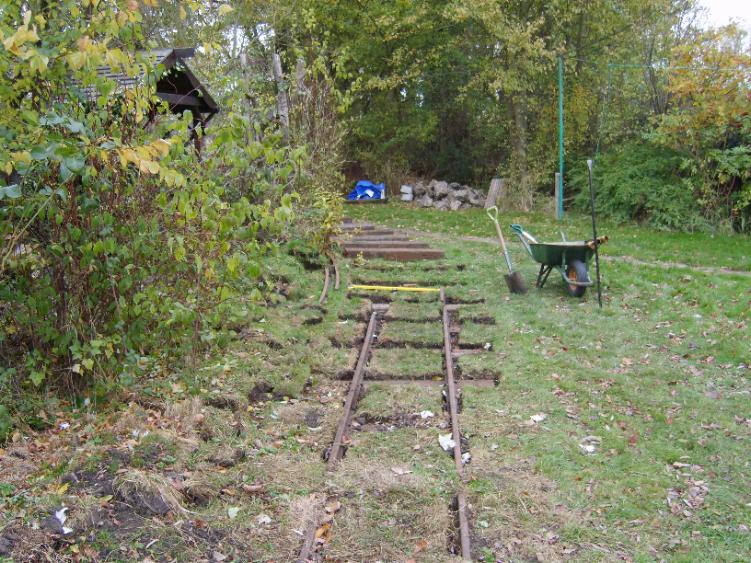
Construction continued away from the loco shed. |
curving around the end of the garden and towards the gate into the field required further use of the JimCrow, but the curve here was not too serious. |
Towards the end of November a milestone was achieved by the track finally reaching the field gate with part of the stables in sight. Over many months previously a sharp gradient had been smoothed out by tipping much spare soil along the projected trackbed. |
A very tight line had to be taken to put the rails inbetween the buildings of the stables, alongside the hardstanding. The railhead was now getting sufficiently far away from the stocks of sleepers and rail that the battery loco was brought into use for moving the materials back and forth.
A siding had been the preferred solution to putting a line into the stables, but as there was no futher lightweight points avaiable anywhere, it was decided that for the phase 'A', that the running line would be laid through the stables to join up with the tracks out in the field. A siding near this area would be considered in the future subject to availability.

|
|
|
|
Date: January 2008 |
Date: January 2008 |
Date: January 2008 |
|
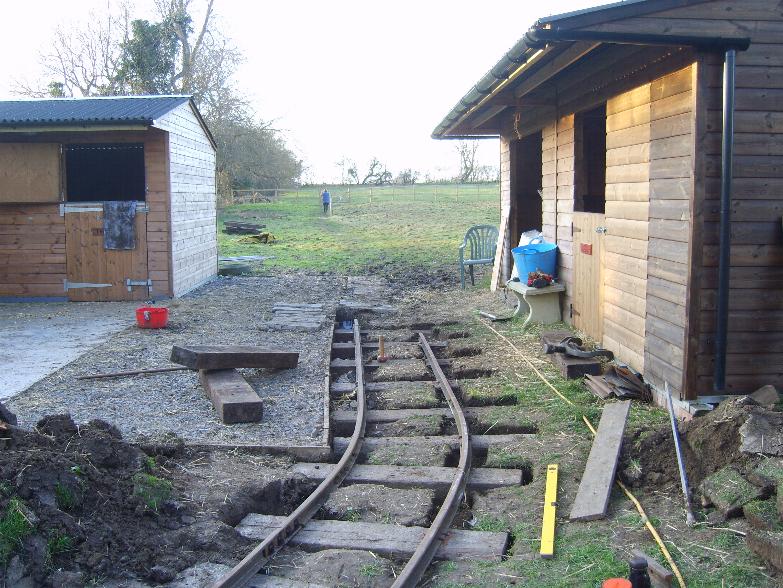
As the tracks near the stables, the bend required to turn alongside the hardstanding appears to be verging on the impossible. |
By smoothing out the alignment, the bend into the stables was achieved with the head of the rail again being at ground height. Shortly there would be timbering put in place to fill in the gaps. |
Finally the proof of the pudding was in the operation and the battery loco was gently driven up the gradient and over the sharp bend. Fortunately without any problems. However, with no check rails, speed over these curves is kept to a minimum. |
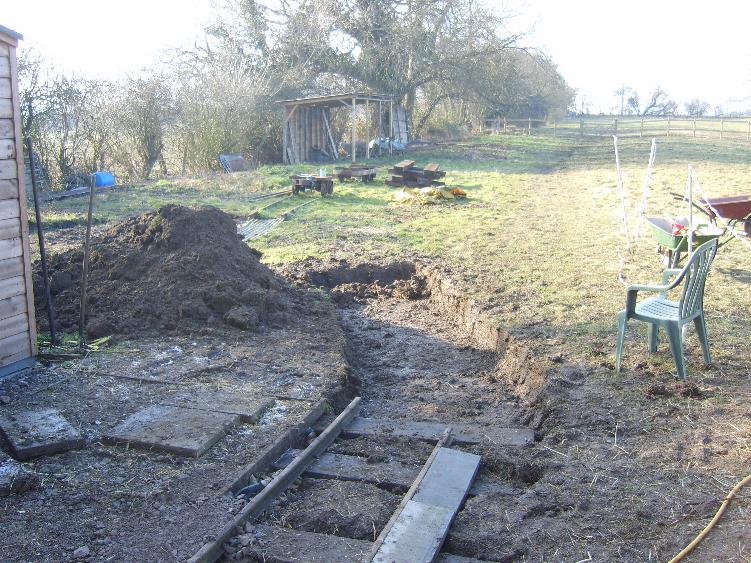
From the stables then lay just 40-60 feet of ground to join up with the track that had been already laid out in the fields. The minor obstacle was that this was the worst piece of ground for water retention on the course of the railway. The decision was taken to completely dig out a trench sufficiently deep to lay a depth of limestone plus land drains alongside. This was the hardest and most time consuming length of track to lay.
|
|
|
|
Date: February 2008 |
Date: February 2008 |
Date: February 2008 |
|
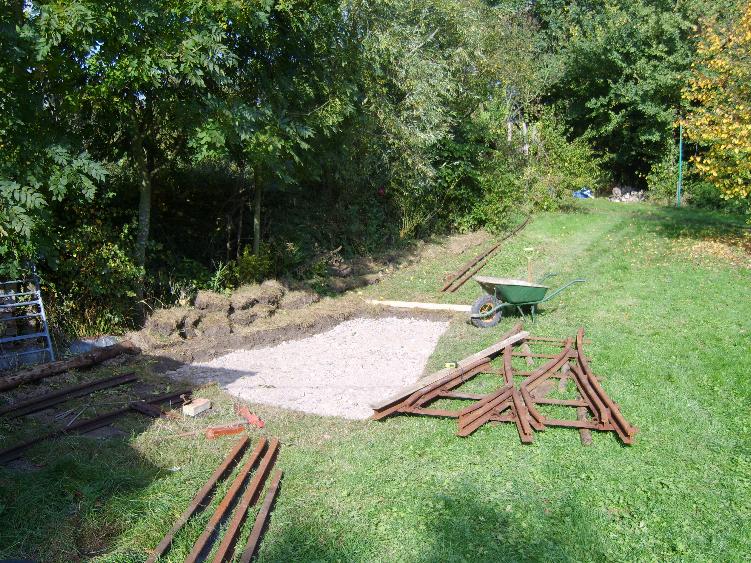
The tracks ended by the edge of the stable block. The other end of the line was hidden in the grass just in front of the stock shed. |
Finally the decision was made to start digging out the trench. |
A task that took many days to cover the gap between the 2 sets of tracks. during this period 2 tonnes of limestone was delivered, which had to be wheelbarrowed to the trench. |
|
|
|
|
Date: March 2008 |
Date: March 2008 |
Date: March 2008 |
|
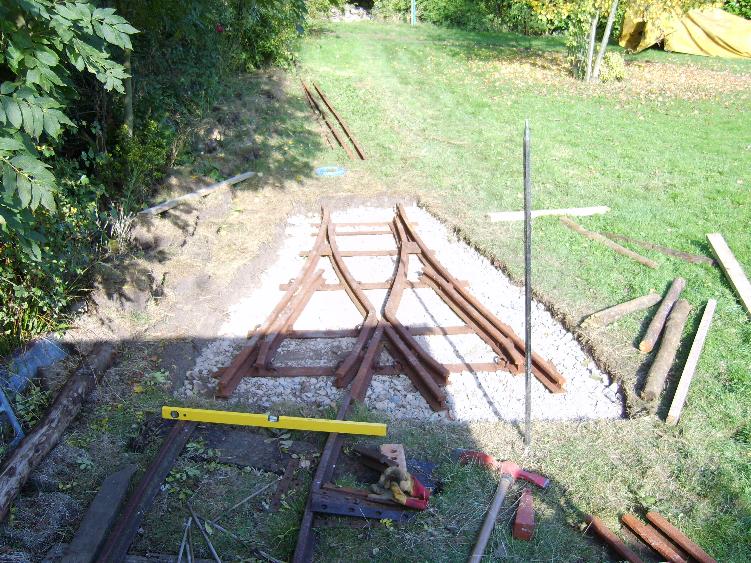
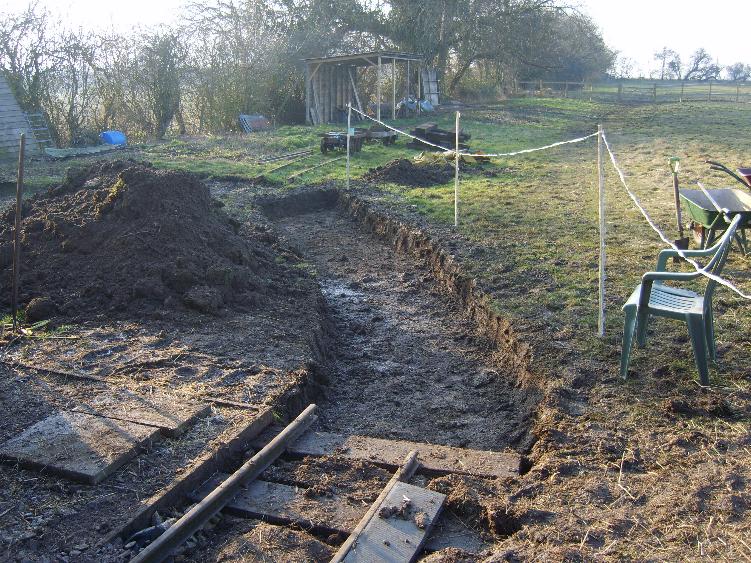
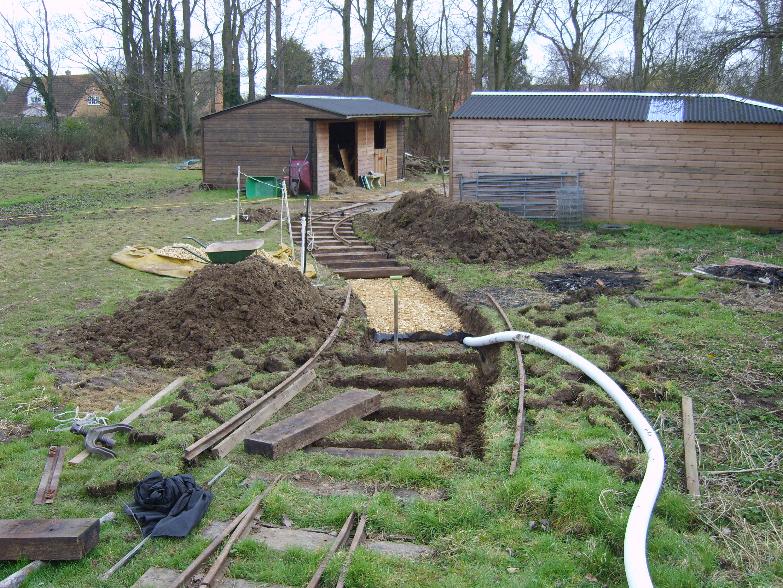
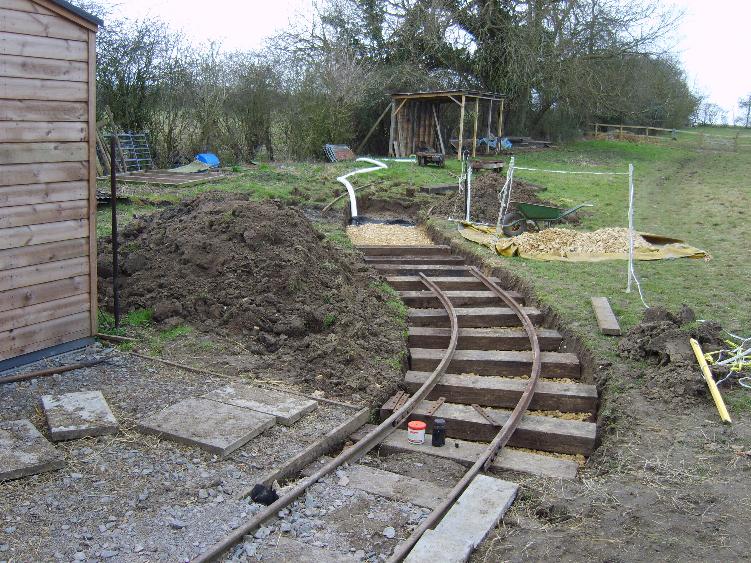
A water permeable membrane was laid in the trench, and even deeper a land drain was dug on down one side. Then a layer of limestone was put down acting as both a firmer bed for the rails, and to improve drainage. |
Once the sleepers where laid and levelled, the rails were then laid and bent from both ends until only a short gap of approx 2ft allowed 2 short lengths of rail to be sawn to fit the gap. |
Finally the soil was laid back around the tracks prior to re-seeding. This also represented a milestone in the construction, now finally giving loco acces across the whole line as far as it had been built. |
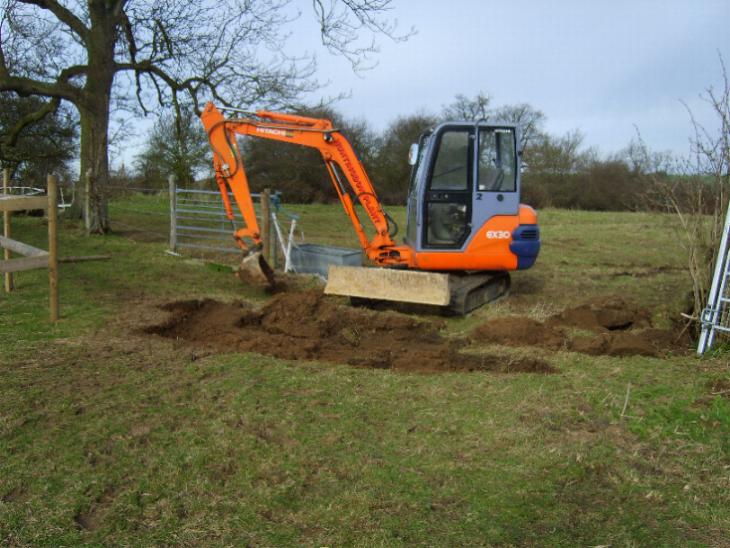
By this stage the far end of the line had been neglected for several months to allow the joining up of the two sections. In February a midi-digger had been hired to assist with levelling the trackbed at the far end of the field. The land had breen previously managed by ridge and furrow ploughing leaving the field resembling a serious of rolling waves. At the far end there was a difference in height of over 2ft in places, so rather than face weeks of manual digging out, 2 days work with the digger had this sorted out, as well as other minor jobs. Then it was a relatively simple straight line to the gate of the next field.
|
|
|
|
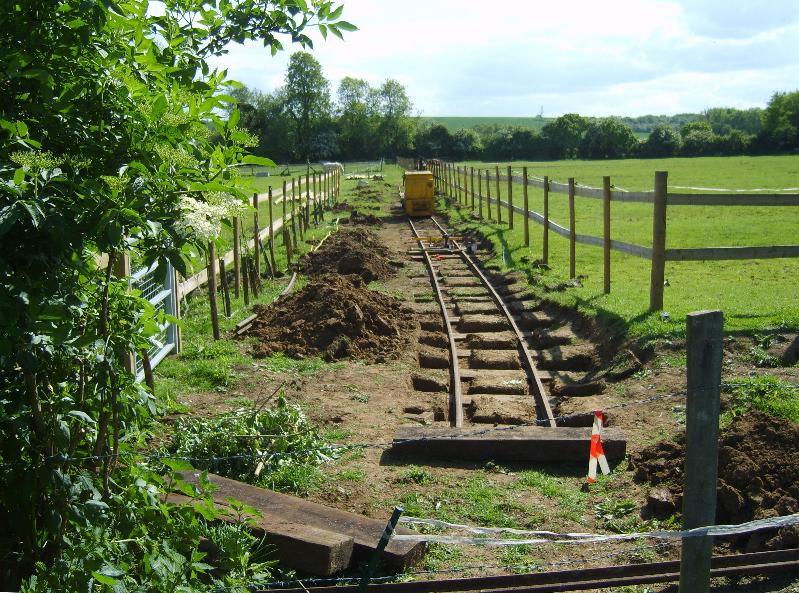
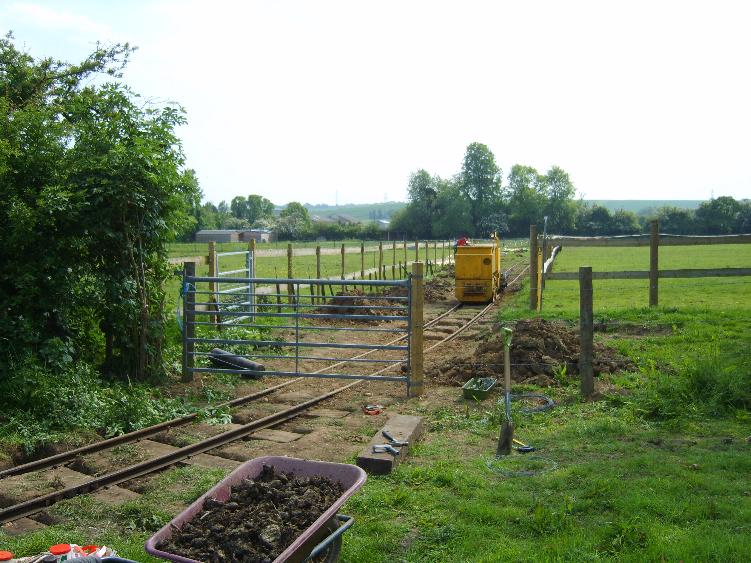
Date: May 2008 |
Date: May 2008 |
Date: May 2008 |
|
The midi-digger about to dig through one of several ridges to smooth out the trackbed for the final stretch. |
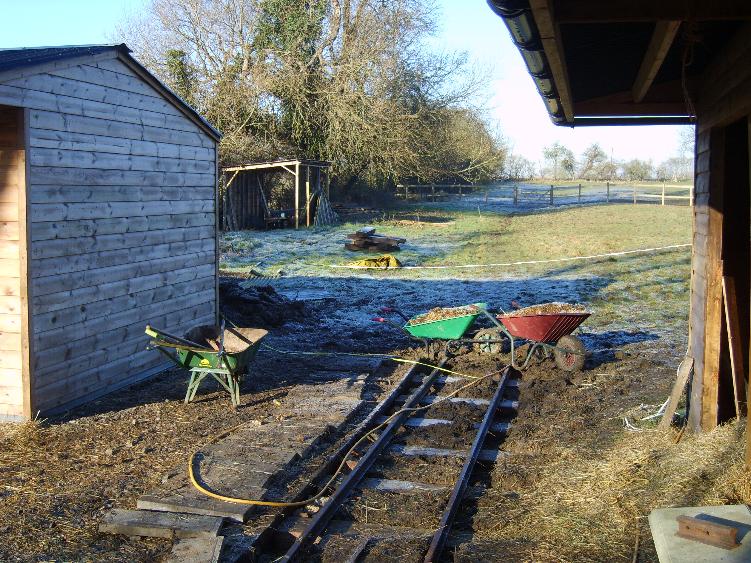
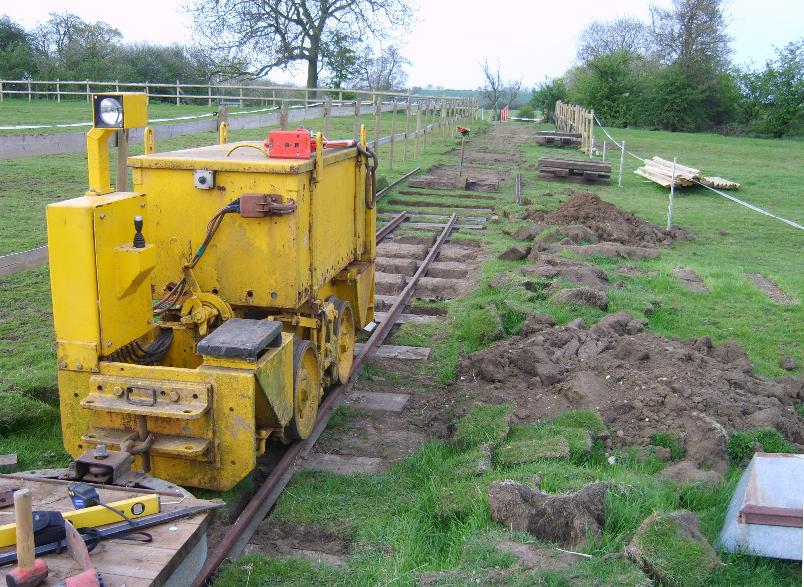
The simple and immediate power of the battery loco was a godsend as the tracks got further away from all the materials and supplies. The two Hudson flat wagons were in permanent use. |
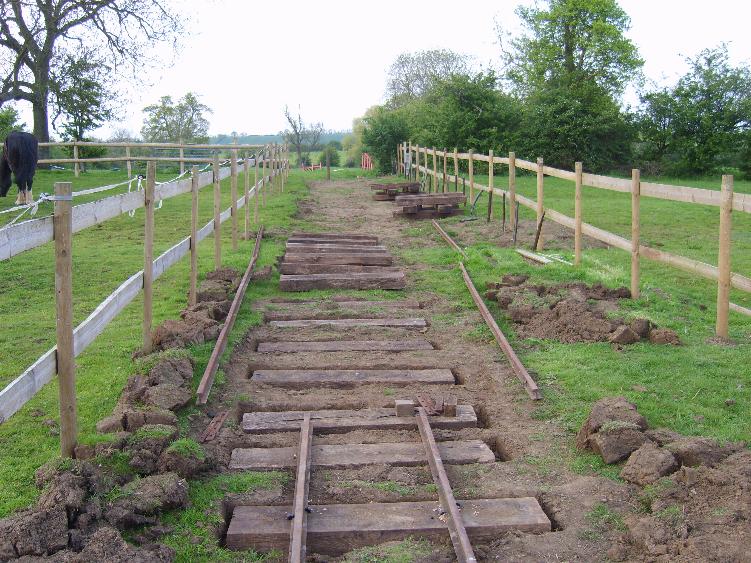
Even with the trackbed roughly flattened out care had to be taken to introduce a slight gradient when digging in the sleepers as there was a gentle uphill slope to the end of the field. |
|
|
|
|
Date: May 2008 |
Date: May 2008 |
Date: May 2008 |
|
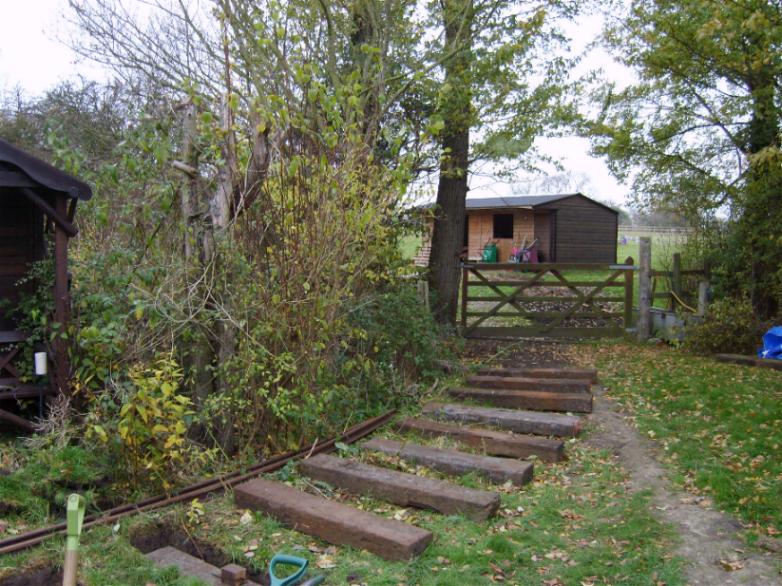
The new public footpath gate can be seen to the left of the picture and the representative from Cambridgeshire footpaths had given the agreement for the railway to cross the public right of way at this point. |
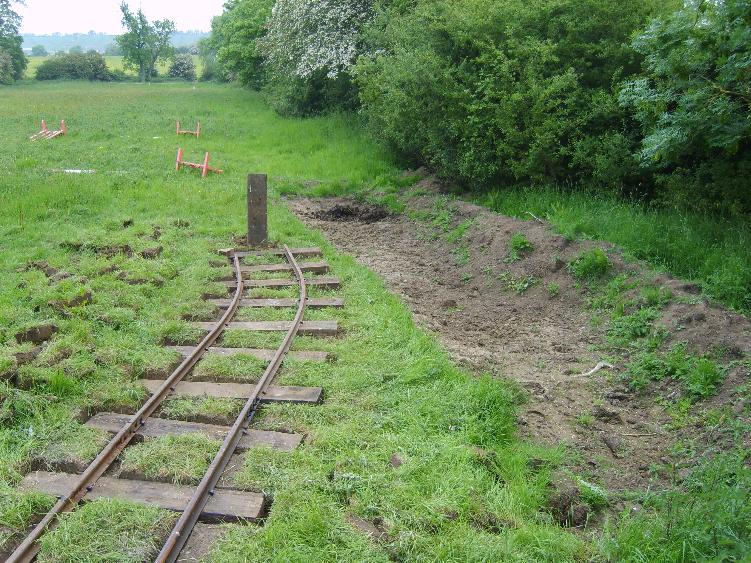
Having repositioned the field gate to the next field, the rails now continued under the gate into the next field. |
However, Phase 'A' of the construction ended just a short way into the next field with a trench dug out on the right side to allow the tipping of the manure. The far end of the field, and the next possible phase, can be seen tantalisingly in the distance. |
To be continued
| Return to the main INGR site |
© Steve Thomason 2008
Upgraded site relaunched 1st January 2004
| Introduction | Construction | Operation | Locos | Updates | Contact |